|
|
The Audio Editor is a digital waveform editor for Windows, which lets you visually manipulate any uncompressed WAV file (other formats supported). The Audio Editor is a hard disk based waveform editing tool, this means you can edit any size file you want. All edits are non-destructive and do not affect the original recording unless you decide to overwrite the file on disk.
Audio Editor:
- Floating Point internal processing throughout, for superior quality
- Supports 8, 16, 17 - 24 bit and Floating Point data files
- Supports Sample Rates up to 96kHz
- Real Time Effects Rack
- Real Time Multi-band Compressor
- Real Time: Graphic Equalisers, Noise Reduction, Filters and other Tools
- CD Ripping, MP3 Encoding and MP3 Decoding tools can be used
- Built in Audio CD player simplifying recording from CD's
- Zero crossing detection enabled as standard, for smooth cutting
- One finger short cuts are provided to the most useful tools and effects
- Cut and Paste features work similarly to those of a word processor
- is an MDI program, that is many files can be open at once
- Format Converter is now integrated in to the Audio Editor
- Perform Frequency Analysis on both file data or any signal at the sound card input
(or even just measure the noise of the sound card itself)
Spectral Analysis of dithered signals and Waterfall FFT Display of speech signal - as a Spectrogram on both file data or any signal at the sound card input
- as an Oscilloscope on both file data or any signal at the sound card input
- Demonstrate Amplitude and Frequency Modulation principles - FFT Display of AM signal
- Demonstrate FIR and IIR filtering techniques
- Demonstrate Signal Detection techniques
- Demonstrate Noise Reduction techniques, including Adaptive Noise Cancellation
The Audio Editor isn't as easy to explain as the Mixing Desk, it would be easier if you had the product on your machine, here goes anyway...
The first thing to do is Open a WAV file.
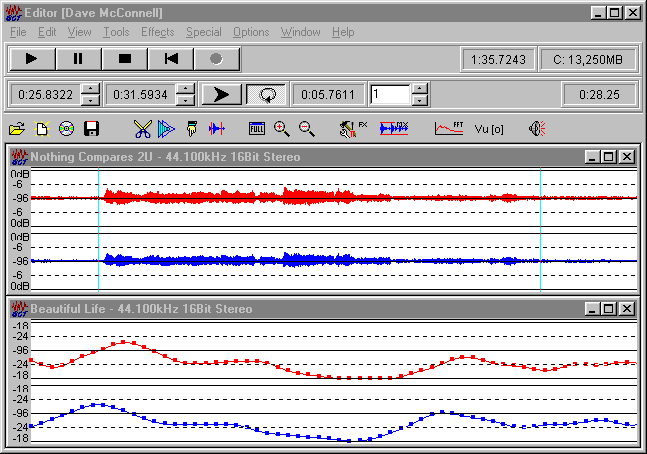
Two panels will be available at the top of the screen.
The top panel contains the media player controls, and the file length indicator.
The second panel contains the Start and End section indicators, a button to play
the selected section, a button to continuously Loop the selected section, and a
position indicator.
A graphical representation of the selected file will also appear in it's own window, with it's name, sampling rate, resolution and channels contained in the title bar.
With the cursor over the selected file, click the left mouse button and drag the mouse to select a section of the file. Notice how the Start and End section indicators track your position. The Start and End section indicators define the position for the selected section that the Editing, Tools, and Effects functions use.
Click the Section Play button, or hit the Space Bar, the file will be playing.
Now, Preview an Effect from the Effects Rack
Select the Effects Rack from the Effects menu (Ctrl + E), this will open up the Effects Rack.
Depress the Echo Button to insert an Echo Unit, and listen to the difference.
You can use the predefined parameters, or edit the effect parameters and save your own settings.
You can apply any combination of effects from the Effects Rack you require.
It's as simple as that.
All the tools and effects operate in a similar manner on the selected section.
Try it, you won't be disappointed.
AudioSuite
